Solar Nail Designs: Your 2024 Glow-Up Guide
Hey there, nail enthusiasts! Ready to dive into the mesmerizing world of solar nail designs that not only look fabulous but also harness the power of solar magic? These nail trends are taking the manicure scene by storm, offering a delightful array of styles that will surely catch your eye. In this article, let’s unravel the secrets behind solar nail designs together – how they work and how you can rock those radiant nails. So, are you excited to embark on this nail adventure with me? Let’s get started!
What Exactly Are Solar Nail Designs?
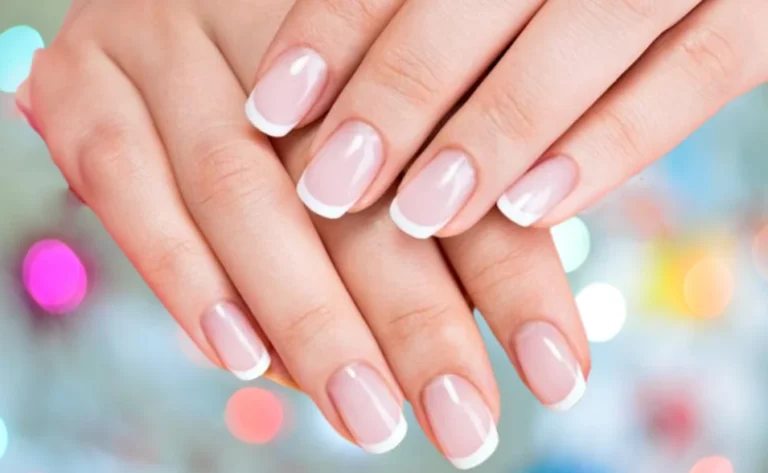
Let’s uncover the allure of solar nail designs! Known as “pink and white” nails, these acrylic masterpieces bring a natural radiance to your fingertips. Unlike traditional acrylics, the solar nail process involves a two-step technique, utilizing white powder for the tips and pink powder for the nail bed. The result? A seamlessly blended, French-manicure-inspired finish that mimics the healthy glow of sun-kissed nails. Get ready to indulge in the beauty of this unique nail art, where every detail contributes to the overall charm of your radiant and naturally elegant nails!
Solar Nails vs. Gel Nails: The Showdown
Gel nails shine with UV-cured sleekness, while solar nails, made of powder and liquid acrylic, cozy up directly to your natural nails. Solar nails, crafted from FDA-approved materials, offer durability with a glossy finish without breaking the bank. Choose gel for UV glam or solar for direct-to-nail charm. Your nails, your style!
Gel Nails
- Application: Gel nails involve brushing a gel onto your natural nails, followed by a quick UV light treatment to set them.
- Look and Feel: Gel nails boast a glossy, natural appearance.
- Strength: While they’re chic, gel nails are slightly less robust than solar nails.
- Eco-Friendly: Gel nails skip the chemicals, making them a greener choice.
- Pregnancy-Friendly: Expecting moms can safely flaunt gel nails.
Solar Nails
- Application: Solar nails bond directly to your natural nails, no UV rays required.
- Durability: These babies last longer than a catchy tune on repeat.
- Cost-Effective: Solar nails won’t break the bank.
- Chemical Caution: If you’re expecting, steer clear of solar nails due to their chemical content.
What is Better: Solar or Acrylic Nails?
Solar Nails: Effortlessly chic, durable, with design options galore. Perfect for a natural, sophisticated look.
Acrylic Nails: Timeless toughness, shapeable and paintable, a classic choice for durability.
Your Pick? If you love a chic, natural vibe with durability, go for solar nails. For classic toughness, acrylic nails are your match!
Understanding the Process: How to Get Solar Nails
Step 1: Consultation and Selection
Embarking on your solar nail journey begins with a consultation at your favorite nail salon. Discuss your preferences, nail length, and the specific solar design you desire. The beauty of solar nails lies in their versatility, allowing you to choose from various styles, shapes, and lengths.
Step 2: Preparation
Once you’ve chosen your desired solar design, the nail technician will start by preparing your natural nails. This involves shaping, filing, and gently buffing the surface to ensure optimal adhesion for the acrylic mixture.
Step 3: Application of White Tips
The magic begins with the application of the white acrylic powder, forming the tips of your solar nails. The technician carefully sculpts and shapes the tips, creating the classic French manicure look. This step sets the foundation for the radiant finish that solar nails are known for.
Step 4: Pink Powder for the Nail Bed
After the white tips have been skillfully applied, the next step involves the pink acrylic powder. This is applied to the nail bed, creating a seamless transition from the white tips to the natural color of your nails. The pink powder enhances the overall natural appearance, giving your nails a healthy and vibrant glow.
Step 5: Finishing Touches
To complete the solar nail transformation, the technician adds a glossy topcoat to seal the design and enhance its durability. This final touch not only adds a brilliant shine but also protects the solar nails, ensuring they remain flawless for an extended period.
Trendy Solar Nail Designs You’ll Adore
Solar nails are all the rage, offering a plethora of designs and colors that cater to diverse tastes. Check out some of the hottest solar nail trends making waves:
1. Classic Pink and White Elegance: For an effortlessly sophisticated look, the classic pink and white solar nails remain a top choice. The gradient effect seamlessly transitioning from pink to white radiates timeless beauty suitable for any occasion.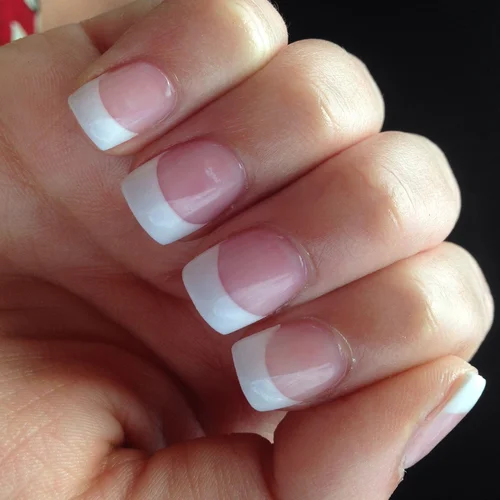
2. Solar Ombre Magic: Elevate your ombre game with a solar twist. Dive into a spectrum of vibrant hues seamlessly blending into one another, creating a breathtaking sunset-inspired ombre effect that steals the show.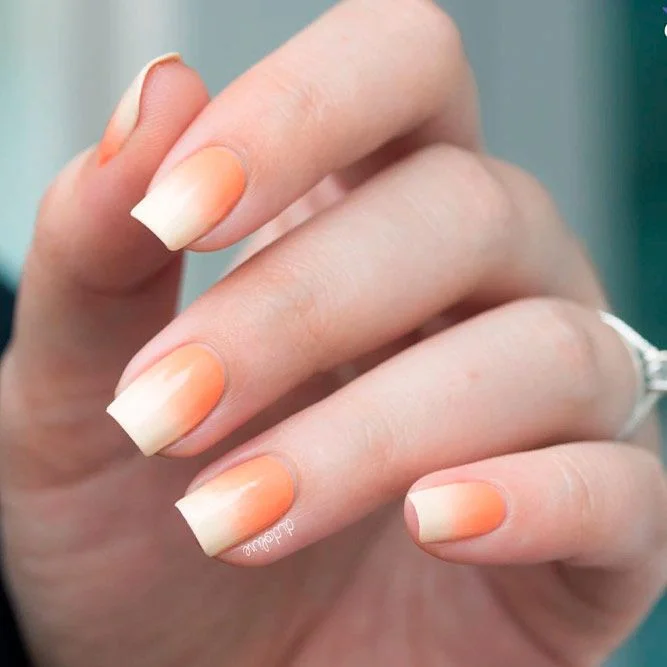
3. Constellation Enchantment: Bring the night sky to your fingertips with deep starry backgrounds adorned with intricate constellations in white and silver hues. This magical design is perfect for stargazers.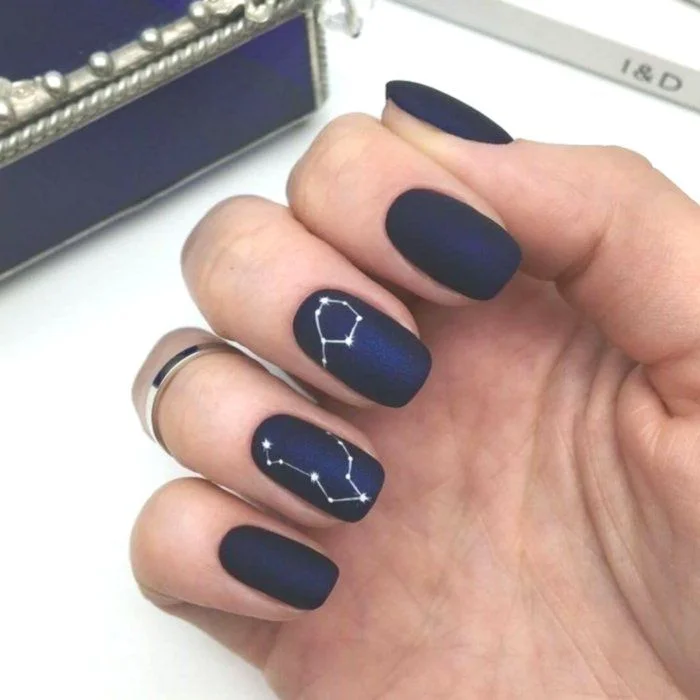
4. Blooming Florals: Infuse your nails with the beauty of nature through solar nail art featuring delicate blossoming florals. Soft pinks, whites, and greens come together to create miniature floral arrangements, adding a romantic touch to your nails.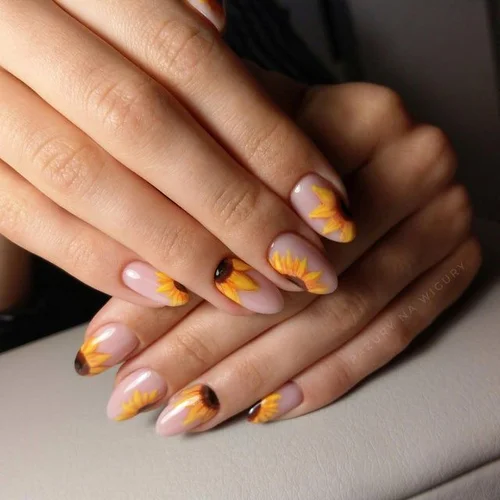
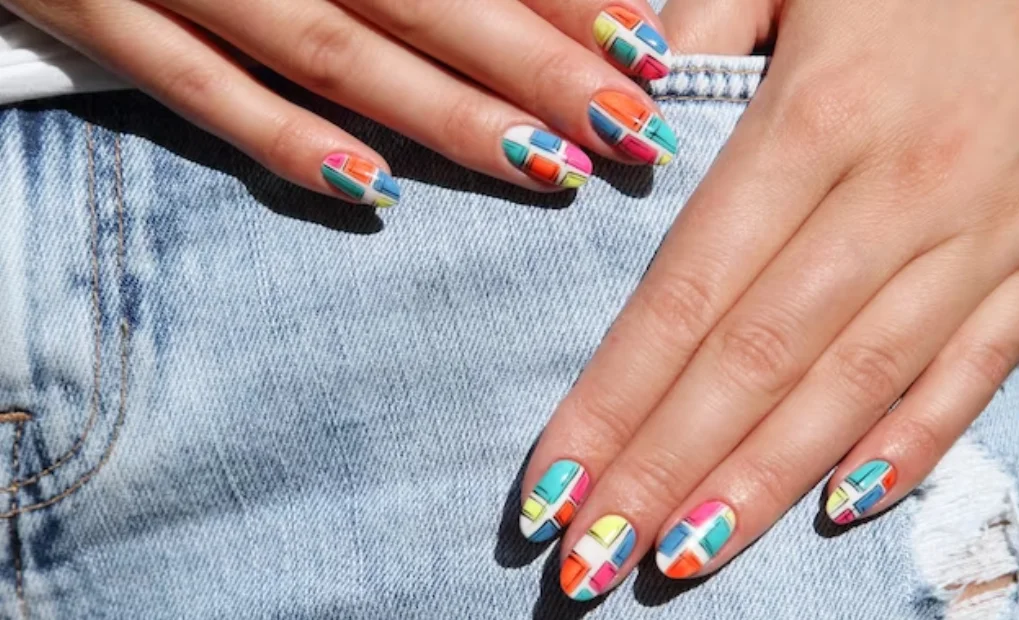
5. Geometric Chic: Geometric lines take center stage, offering a modern and edgy pattern that’s sure to turn heads. Experiment with different color combinations to match your unique style.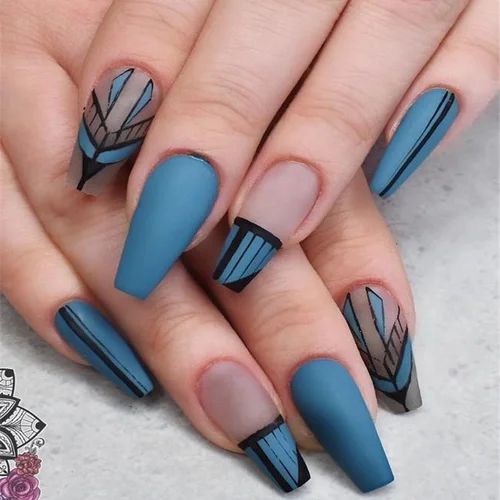
6. Mermaid Scales: Dive into an aquatic vibe by experimenting with shades of blue, green, and purple. These mermaid-inspired nails are bound to make a splash wherever you go.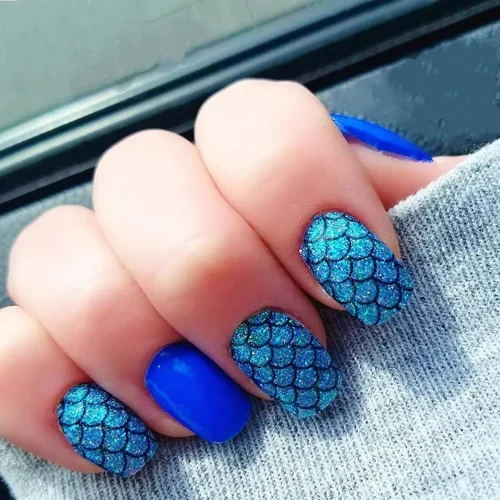
7. Metallic Glamour: Elevate your solar nails with a touch of glamour using metallic accents. Incorporate shiny gold, silver, or rose gold elements for a dazzling and opulent finish.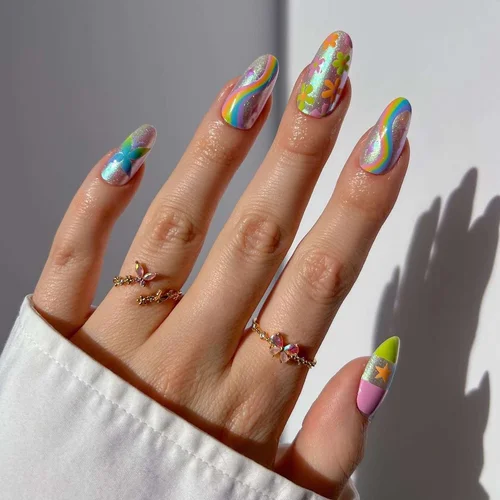
8. Neon Vibes: Perfect for color enthusiasts, neon solar nail designs play with bright and vibrant shades, ensuring your nails grab attention wherever you go.
9. Marble Elegance: Channel the timeless charm of marble onto your solar nails. Experiment with subtle shades to achieve an elegant and unique marble effect.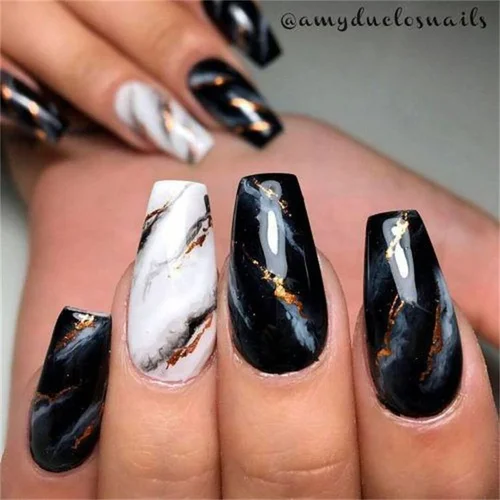
10. Abstract Artistry: Unleash your creativity with abstract solar nail designs. Mix and match colors, shapes, and patterns to create a personalized masterpiece on each nail. Let your nails be your canvas!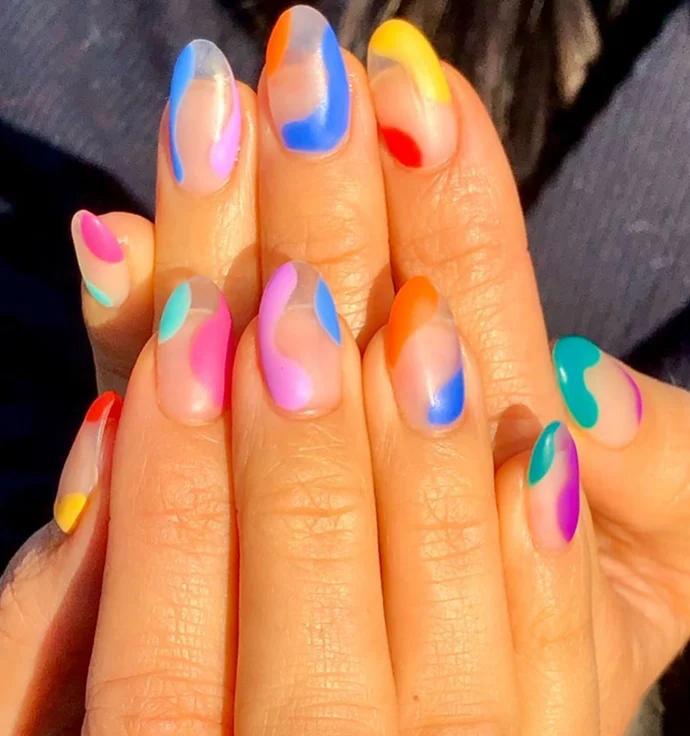
These trendy solar nail designs are ready to add a touch of flair and personality to your fingertips.
Solar Nails at Home: A DIY Guide
Now, if you’re all about solar nails but want the lowdown on doing it yourself at home, we’ve got your back.
What You Need:
- Solar Nail Kit (the one with white and pink acrylic powders, liquid monomer, and topcoat)
- Nail files
- Buffer
- Cuticle pusher
- Acetone
- Nail brush
- Base coat/ Primer
- Cotton balls
Step-by-Step Fun:
- Prep Time: Shape those natural nails with a file and buff away the shine.
- Tip Top: Dive into the monomer and then the white acrylic powder. Get those tips looking snazzy and let them dry.
- Pink Perfection: Repeat the dance with the pink acrylic powder on the nail bed. Seamless transition, here we come. Let it dry – patience, my friend.
- Shape Up: Once the acrylic is party-ready, file and shape those nails to your liking. Smooth things out with a buffer.
- Gloss It Up: Seal the deal with a topcoat for that extra shine and durability.
Ta-da! You’ve just created your own solar nail magic at home. Just remember, take it slow if you’re new to the DIY nail game. And when in doubt, a pro’s advice is like gold.
In the never-ending solar vs. acrylic chat, it’s all about what speaks to your heart (or should we say, your fingertips). Both have their perks, offering a world of beauty and creativity. So, which one are you vibing with, friend? Let your nails do the talking!
Maintaining the Radiance: Tips for Solar Nail Care
Gentle Care is Key
While solar nails are durable, it’s essential to handle them with care. Avoid using your nails as tools and be cautious while performing activities that could put stress on your fingertips. This gentle approach will help prolong the life of your solar nails.
Regular Maintenance
To keep your solar nails looking fresh and radiant, schedule regular maintenance appointments at your nail salon. This typically involves filling in the growth gap at the nail bed and ensuring the tips remain pristine. Regular maintenance not only enhances the aesthetic appeal but also contributes to the longevity of your solar nails.
Hydration for Healthy Nails
Maintaining the health of your natural nails is crucial for the overall success of your solar nails. Hydrate your nails and cuticles regularly with a nourishing oil or moisturizer. This practice promotes healthy nail growth and ensures a smooth canvas for your next solar nail application.
How to Remove Solar Nail Designs?
Let’s chat about bidding farewell to those fabulous solar nail designs. It’s a walk in the park, and you can totally nail this DIY removal at home. Grab your essentials – acetone, cotton balls, aluminum foil, and a trusty nail file. Here’s your go-to guide for the removal steps:
- Shine, Shine Away: Begin by giving the top layer of your solar nails a little file dance to remove that shiny finish.
- Cotton Ball Magic: Take a cotton ball, soak it in acetone, and let it be the superhero that sits on top of your nail.
- Wrap it Up: Your nail is in for a treat – wrap it snugly in aluminum foil, like giving it a cozy blanket to chill with the acetone-soaked cotton ball.
- Time to Chill: Let the magic happen for 10-15 minutes. Use this time to catch up on your favorite show or perhaps practice some nail art inspiration – totally your call!
- Unveil the Magic: Take off the aluminum foil and bid farewell to the cotton ball – it’s like unwrapping a little surprise for your nails.
- Final Touch: Gently use a nail file to sweep away any remnants of those solar nails.
And there you have it – a DIY removal session that makes you the master of your nail destiny. Simple, friendly, and oh-so-kind to your natural nails. Now, go flaunt those bare nails or get ready for a fresh, new nail adventure!
Bottom Line
Closing the chapter on our exploration of solar nail designs reveals more than just a feast for the eyes. These luminous creations embody a harmonious blend of artistic expression and ingenuity, turning your nails into a captivating canvas of self-discovery. Whether you lean towards the timeless allure of a classic French manicure or venture into the realm of distinctive designs, solar nails pledge to catapult your nail game to dazzling new heights. Ready to let your fingertips radiate with solar allure? The choice is yours, and within it lies a realm of possibilities as boundless as the captivating designs themselves.

