
12 Home Remedies for Dull Skin: Brighten Your Complexion Naturally
Are you tired of looking in the mirror and seeing lackluster skin staring back at you? Don’t fret! Dull skin is a common concern that many of us face, but luckily, there are plenty of natural remedies right in your kitchen to help you reclaim your radiant glow. Let’s dive into the world of skincare and discover the top 12 remedies for banishing dullness and revealing a luminous complexion.
What Exactly is Dull Skin?
Dull skin is when your complexion loses its natural radiance and looks tired or lackluster. It’s like when your skin seems a bit dull, uneven, or doesn’t have that healthy glow. This happens because of things like dead skin cells, dehydration, sun damage, a poor diet, and stress. But don’t worry! With the right care and some lifestyle changes, you can bring back your skin’s natural radiance and get that sought-after glow.
Why Does Skin Become Dull?
Several factors can contribute to dull skin, including environmental stressors like pollution and UV exposure, lifestyle habits such as poor diet and lack of sleep, and aging. Additionally, a buildup of dead skin cells on the surface of the skin can contribute to dullness, as can dehydration and a lack of proper hydration.
1. Dead Skin Cells
When dead skin cells pile up, they create a dull, lackluster look, acting like a barrier that blocks light from reflecting off your skin.
Solution
Exfoliation is your secret weapon! Regularly slough off those lifeless cells to reveal fresh, radiant skin underneath.
2. Dehydration
When your skin doesn’t get enough moisture, it loses its natural glow and looks dull. Hydrated skin, on the other hand, is happy skin!
Solution
Drink water like it’s your job! Aim for at least 8 to 10 glasses daily. Also, choose a lightweight, non-comedogenic moisturizer to lock in that hydration.
3. Poor Blood Circulation
When your blood doesn’t flow well, your complexion may appear dull. It’s time to get that blood pumping!
Solution
Exercise, massage, and facial yoga—anything that gets your blood flowing will do wonders for your skin.
4. Sun Damage
Exposure to UV rays from the sun can harm the collagen and elastin in your skin, causing it to look dull and uneven in tone.
Solution
SPF all day, every day! Sunscreen isn’t just for beach days. Wide-brimmed hats are your stylish allies too.
5. Lifestyle Factors
Stress, insufficient sleep, and an unhealthy diet can all play a role in causing lackluster skin.
Solution
Prioritize self-care. Sleep well, manage stress, and nourish your body with skin-loving foods.
6. Antioxidants
These little warriors combat free radicals, which are harmful molecules that can lead to premature aging and dull skin.
Solution
Berries, leafy greens, and dark chocolate are rich in antioxidants. Incorporate them into your diet for that inner glow.
7. Vitamin C
Vitamin C works wonders for dull skin by brightening it, evening out skin tone, and boosting collagen production.
Solution
Look for serums or creams containing vitamin C. Apply in the morning for maximum effect.
8. Overuse of Harsh Cleansers
Using harsh or stripping cleansers can disrupt the skin’s natural moisture barrier, leading to dryness, irritation, and dullness.
Solution
Opt for gentle, pH-balanced cleansers that effectively cleanse the skin without stripping away its natural oils. Look for sulfate-free formulas that won’t overly dry or irritate the skin, especially if you have sensitive or dry skin.
9. Leaving Makeup On Overnight
Leaving your makeup on overnight can lead to dull skin. When you leave makeup on for too long, it can clog pores and prevent your skin from breathing properly, resulting in a lackluster complexion. To avoid dullness, make sure to remove your makeup before bed every night.
Solution
Remove makeup before bed using a gentle cleanser. Let your skin breathe and renew during sleep to prevent dullness and maintain a fresh, healthy appearance.
10. Beauty Sleep and Stress Reduction
Aim for 7-9 hours of quality sleep. Your skin repairs itself during this time. Sweet dreams, beautiful! Practice mindfulness, yoga, or simply take a deep breath. Your skin will thank you with a healthy glow.
Solution
Aim for 7-9 hours of quality sleep each night and practice stress-reduction techniques such as meditation or deep breathing exercises.
Top 12 Natural Remedies for Dull Skin
Let’s begin with easy and effective remedies using natural ingredients to revive dull skin.
1. Lemon and Honey Facial Mask
Lemons are packed with vitamin C, which helps brighten the skin and even out skin tone. When combined with honey, which is a natural humectant, this mask provides deep hydration while also helping to clarify and rejuvenate the skin.
Creating Your Own Glow: How to Make a Lemon and Honey Facial Mask
- Gather Your Ingredients: You’ll need fresh lemon and honey. Lemons provide the vitamin C boost, while honey brings its moisturizing and clarifying properties.
- Mix It Up: Squeeze the juice from half a lemon into a bowl and add an equal amount of honey. Stir until well combined to create a smooth mixture.
- Apply the Mask: Using clean fingertips or a brush, gently apply the mask to your face, avoiding the sensitive eye area. Ensure that an even layer covers your skin.
- Let It work. Its Magic: Sit back and relax for about 15 minutes while the mask gets to work. This gives the vitamin C and honey time to penetrate your skin and reveal its natural radiance.
- Rinse Off: After 15 minutes, gently rinse off the mask with lukewarm water. Pat your skin dry with a soft towel.
- Feel the Glow: Marvel at your refreshed and rejuvenated complexion. Your skin will feel hydrated, clarified, and ready to take on the day.
2. Exfoliating Coffee Scrub
Coffee isn’t just for perking you up in the morning—it’s also great for perking up your skin! The granules in coffee grounds make an excellent natural exfoliant, helping to slough away dead skin cells and reveal a fresh, radiant complexion underneath.
Brewing Up Beauty: How to Whip Up an Exfoliating Coffee Scrub
- Gather Your Ingredients: You’ll need coffee grounds—preferably used ones from your morning brew—and a small bowl to mix.
- Mix It Up: Transfer the coffee grounds into the bowl. If you prefer a finer texture, you can grind the coffee grounds a bit more using a grinder.
- Apply the Scrub: With clean, damp hands, scoop a small amount of the coffee scrub and gently massage it onto your damp skin. Focus on areas that need extra attention, like elbows, knees, and heels.
- Massage and Rinse: Using circular motions, massage the scrub into your skin for a few minutes. Enjoy the invigorating aroma as the coffee granules work their magic. Then, rinse off thoroughly with lukewarm water.
- Feel the Glow: Pat your skin dry with a towel and revel in the newfound smoothness and radiance of your complexion. Follow up with your favorite moisturizer for an extra boost of hydration.
3. Turmeric Brightening Paste
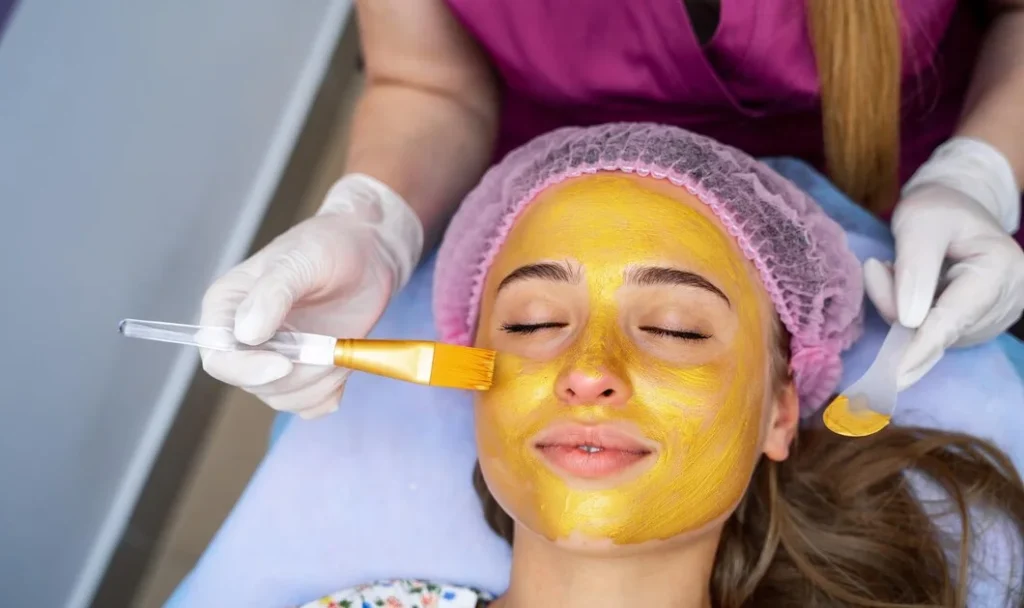
Turmeric has been used for centuries in traditional medicine for its anti-inflammatory and antioxidant properties. When used as a skincare ingredient, it can help reduce inflammation, promote healing, and brighten the skin, leaving you with a healthy, radiant glow.
Crafting Your Turmeric Brightening Paste: How to Whip It Up
- Mix It Up: Combine 1 tablespoon of turmeric powder with 1 tablespoon of honey and 1 tablespoon of plain yogurt in a bowl. Mix until smooth.
- Apply: Use clean fingers to spread the paste onto your face, avoiding the eyes.
- Let It Sit: Leave the paste on for 15-20 minutes to let the turmeric work its magic.
- Rinse off: Gently wash off the paste with lukewarm water, revealing a radiant glow.
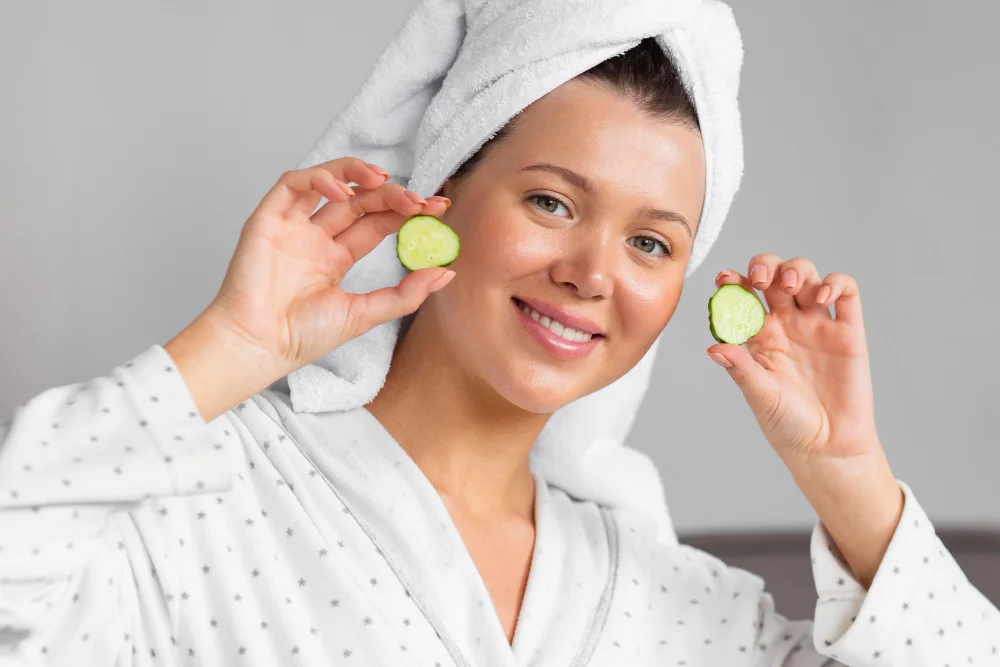
4. Hydrating Cucumber Face Pack
Cucumbers are not only a refreshing snack—they’re also a skincare powerhouse! Packed with water and nutrients, cucumbers help hydrate and soothe the skin, making them the perfect ingredient for a hydrating face pack that can help combat dullness and dryness.
Crafting Your Cucumber Hydrating Face Pack: How to Whip It Up
- Gather Your Ingredients: You’ll need one fresh cucumber and a blender or food processor.
- Prepare the Cucumber: Wash the cucumber thoroughly to remove any dirt or residue. Then, slice it into chunks and add them to the blender or food processor.
- Blend Until Smooth: Blend the cucumber until it forms a smooth, creamy consistency. If desired, you can strain the mixture to remove any excess pulp.
- Apply to Your Face: Using clean fingertips or a brush, apply a generous layer of the cucumber puree to your freshly cleansed face, avoiding the eye area.
- Relax and Rejuvenate: Sit back and relax for 15-20 minutes while the cucumber works its magic. Take this time to unwind and treat yourself to a mini-spa session.
- Rinse Off: After the designated time has passed, rinse off the face pack with lukewarm water, patting your skin dry with a soft towel.
5. Avocado and Yogurt Mask
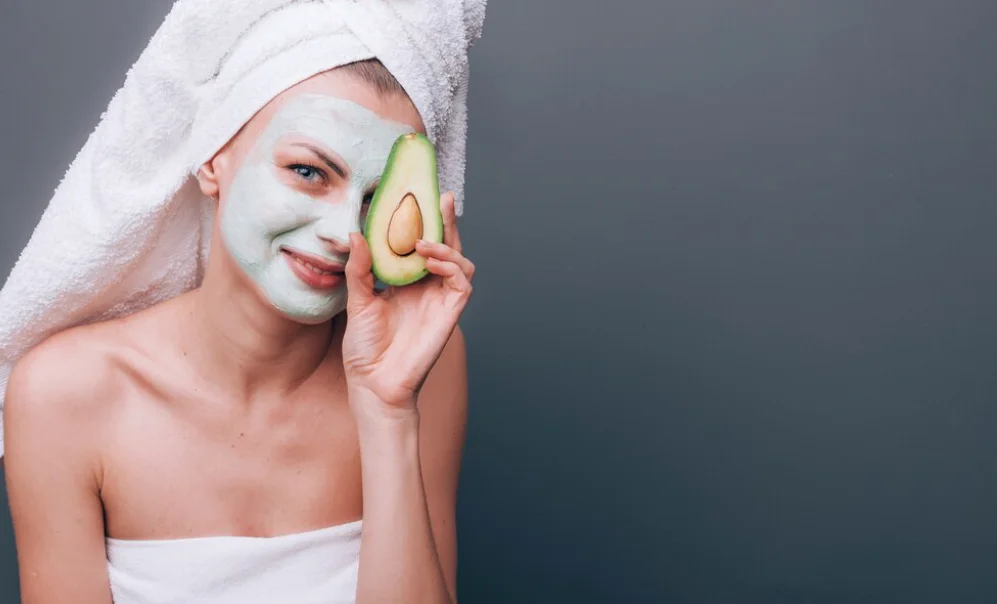
Avocado is rich in healthy fats and vitamins that nourish and hydrate the skin, while yogurt contains lactic acid, which helps exfoliate and brighten the skin. Together, these two ingredients make a powerful mask that can help revitalize tired, dull-looking skin.
Crafting Your Avocado and Yogurt Mask: How to Whip It Up
- Gather Your Ingredients: You’ll need a ripe avocado, plain yogurt, and a small bowl.
- Prepare the Avocado: Cut the avocado in half and remove the pit. Scoop out the flesh and place it in the bowl.
- Mash the Avocado: Use a fork to mash the avocado until it reaches a smooth consistency, free of any lumps.
- Add the Yogurt: Add a tablespoon of plain yogurt to the mashed avocado and stir until well combined.
- Customize to Your Needs: Feel free to customize your mask with additional ingredients, such as honey for added hydration or lemon juice for brightening.
- Apply the Mask: Using clean fingertips or a brush, apply a thick layer of the mask to your cleansed face, avoiding the eye area. Allow the mask to sit for 10–15 minutes to allow the ingredients to penetrate the skin.
- Rinse Off: After the designated time has passed, rinse off the mask with lukewarm water, massaging in circular motions to exfoliate the skin. Pat your skin dry with a soft towel.
6. Oatmeal Soothing Mask
Oatmeal is known for its soothing properties, making it perfect for calming irritated skin and reducing redness and inflammation. It also has gentle exfoliating properties, which can help remove dead skin cells and reveal a brighter, smoother complexion.
Crafting Your Oatmeal Soothing Mask: How to Whip It Up
- Gather Your Ingredients: You’ll need oatmeal (either rolled oats or instant oats) and water or a liquid of your choice, such as milk or yogurt.
- Prepare the Oatmeal: If using rolled oats, grind them into a fine powder using a blender or food processor. If using instant oats, you can skip this step.
- Mix It Up: In a bowl, combine the ground oatmeal with enough water or liquid to form a smooth paste. Stir until well combined.
- Customize to Your Needs: Feel free to customize your mask with additional ingredients, such as honey for added hydration or mashed avocado for extra nourishment.
- Apply the Mask: Using clean fingertips or a brush, apply a thick layer of the oatmeal paste to your cleansed face, avoiding the eye area. Allow the mask to sit for 10–15 minutes to allow the soothing properties of oatmeal to work their magic.
- Rinse Off: After the designated time has passed, rinse off the mask with lukewarm water, massaging in circular motions to exfoliate the skin. Pat your skin dry with a soft towel.
7. Rosewater Toner
Rosewater has been used for centuries as a natural beauty product, thanks to its hydrating, soothing, and pH-balancing properties. Using a rosewater toner after cleansing can help refresh and revitalize dull skin, leaving it glowing and dewy.
Crafting Your Rosewater Toner: How to Whip It Up
- Gather Your Ingredients: You’ll need fresh rose petals and distilled water.
- Prepare the Rosewater: Place the rose petals in a pot and cover them with distilled water. Bring the water to a gentle simmer over low heat and allow the petals to steep for 20–30 minutes, until the water takes on a subtle pink hue and the petals have released their essence.
- Strain and Store: Once the rosewater has cooled, strain out the rose petals and transfer the liquid to a clean, sterilized bottle or spray bottle. Store the rosewater in a cool, dark place to preserve its freshness.
- Customize to Your Needs: For added skincare benefits, you can enhance your rosewater toner with other botanical ingredients, such as witch hazel for additional astringent properties or glycerin for extra hydration.
- Apply the Toner: After cleansing your face, saturate a cotton pad with rosewater toner and gently swipe it across your skin, avoiding the delicate eye area. Alternatively, you can transfer the toner to a spray bottle and mist it directly onto your face for a refreshing pick-me-up throughout the day.
8. Aloe Vera Gel
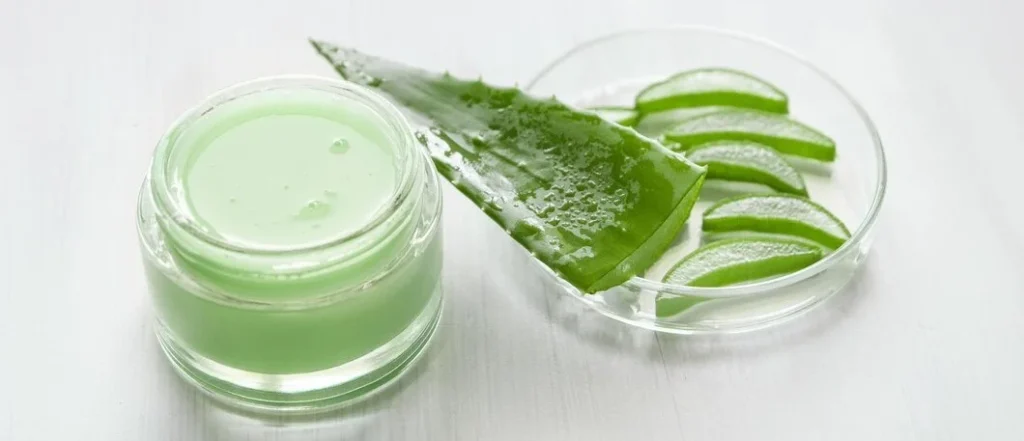
Aloe vera is a well-known skincare ingredient with a wide range of benefits. It helps soothe and hydrate the skin, promote healing and regeneration, and reduce inflammation and redness—all of which can help combat dullness and leave your skin looking fresh and revitalized.
Crafting Your Aloe Vera Gel: How to Whip It Up
- Gather Your Ingredients: You’ll need fresh aloe vera leaves and a sharp knife.
- Harvest the Gel: Carefully slice open a fresh aloe vera leaf lengthwise to reveal the gel inside. Use a spoon to scoop out the gel and transfer it to a clean container.
- Blend and Strain (Optional): For a smoother consistency, you can blend the gel in a blender or food processor until smooth. If desired, strain the gel through a fine-mesh sieve to remove any remaining fibers.
- Store and Enjoy: Transfer the aloe vera gel to a clean, airtight container and store it in the refrigerator to prolong its shelf life. Use as needed for various skincare applications, such as soothing sunburns, hydrating dry skin, or refreshing a tired complexion.
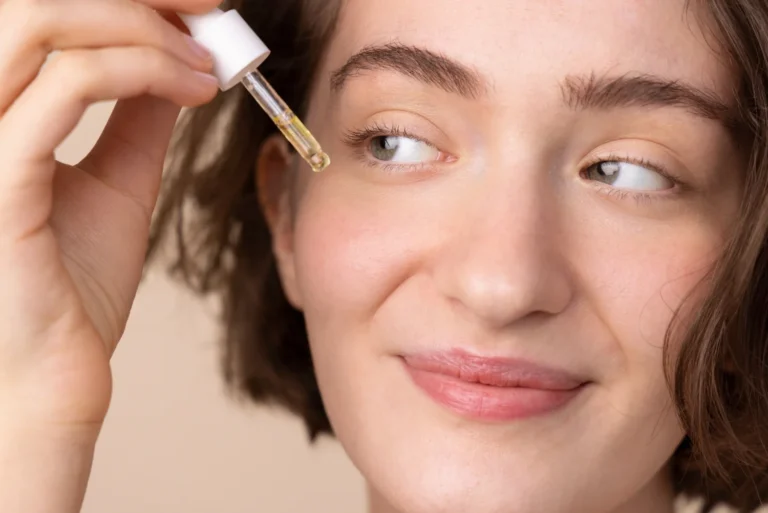
9. Vitamin C Serum
Vitamin C is a powerful antioxidant that helps protect the skin from free radical damage and brightens the complexion. Using a vitamin C serum regularly can help even out skin tone, reduce hyperpigmentation, and give your skin a radiant glow.
Crafting Your Vitamin C Serum: How to Whip It Up
- Gather Your Ingredients: You’ll need L-ascorbic acid powder (pure vitamin C), distilled water, and a small, dark glass bottle with a dropper.
- Mix It Up: In a clean bowl, combine 1 teaspoon of L-ascorbic acid powder with 1 tablespoon of distilled water. Stir until the powder is completely dissolved.
- Store Properly: Transfer the vitamin C serum into the dark glass bottle using a funnel. Dark glass helps to protect the serum from light and oxidation, preserving its potency.
- Customize to Your Needs: For added skincare benefits, you can enhance your vitamin C serum with other ingredients, such as hyaluronic acid for hydration or vitamin E for enhanced antioxidant protection.
- Apply and Enjoy: After cleansing and toning your skin, apply a few drops of the vitamin C serum to your face and neck, avoiding the eye area. Gently massage the serum into your skin until it is fully absorbed. Follow up with your favorite moisturizer and sunscreen during the day for added protection.
10. Green Tea Face Mist
Green tea is another antioxidant-rich ingredient that can work wonders for your skin. When used in a face mist, it helps hydrate and refresh the skin while also reducing inflammation and protecting against environmental damage, leaving your complexion looking bright and revitalized.
Crafting Your Green Tea Face Mist: How to Whip It Up
- Brew the Green Tea: Steep a green tea bag or loose green tea leaves in hot water for 3-5 minutes, until the water takes on a light green hue and the tea is fully infused.
- Let It Cool: Allow the brewed green tea to cool to room temperature or transfer it to the refrigerator for faster chilling. Avoid using hot tea, as it can cause the mist to spoil more quickly.
- Transfer to a Spray Bottle: Once the green tea has cooled, pour it into a clean, empty spray bottle using a funnel. Opt for a dark glass bottle to protect the potency of the antioxidants from light exposure.
- Customize to Your Needs: For added skincare benefits, you can enhance your green tea face mist with other ingredients, such as aloe vera gel for soothing hydration or witch hazel for toning and clarifying properties.
- Shake and Spritz: Before each use, give the bottle a gentle shake to ensure the ingredients are well mixed. Close your eyes and mist the green tea solution onto your face and neck, holding the bottle 6–8 inches away from your skin. Allow the mist to air dry, or gently pat it into your skin with clean hands.
11. Papaya Enzyme Mask
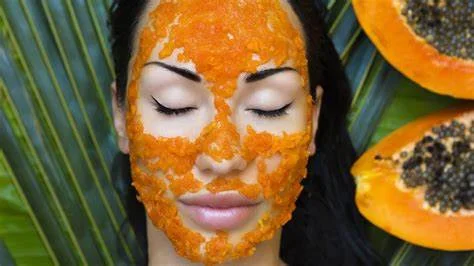
Papaya contains natural enzymes called papain, which have exfoliating properties that help remove dead skin cells and reveal brighter, smoother skin underneath. Using a papaya enzyme mask regularly can help improve skin texture and tone, leaving your complexion looking fresh and luminous.
Crafting Your Papaya Enzyme Mask: How to Whip It Up
- Gather Your Ingredients: You’ll need ripe papaya, honey, and a blender or food processor.
- Prepare the Papaya: Peel and remove the seeds from the ripe papaya. Cut the flesh into chunks and place them in the blender or food processor.
- Blend Until Smooth: Blend the papaya chunks until they form a smooth and creamy consistency. If necessary, add a small amount of water to facilitate blending.
- Add Honey: Add a tablespoon of honey to the papaya puree and blend again until the ingredients are well combined.
- Customize to Your Needs: Feel free to customize your mask with additional ingredients, such as yogurt for added hydration or oatmeal for gentle exfoliation.
- Apply the Mask: Using clean fingertips or a brush, apply a generous layer of the papaya enzyme mask to your cleansed face, avoiding the eye area. Allow the mask to sit for 10–15 minutes to allow the enzymes to work their magic.
- Rinse Off: After the designated time has passed, rinse off the mask with lukewarm water, gently massaging in circular motions to exfoliate the skin. Pat your skin dry with a soft towel.
12. Coconut Oil Massage
Coconut oil is a versatile skincare ingredient that can be used to hydrate, nourish, and protect the skin. Its rich texture makes it an excellent choice for a moisturizing massage oil that can help lock in moisture and leave your skin looking soft, supple, and radiant.
Crafting Your Coconut Oil Massage Blend: How to Whip It Up
- Gather Your Ingredients: You’ll need virgin coconut oil and optional essential oils for fragrance and additional skincare benefits.
- Prepare the Coconut Oil: If the coconut oil is solid at room temperature, gently warm it in a double boiler or microwave until it becomes liquid.
- Add Essential Oils (Optional): If desired, add a few drops of your favorite essential oils to the melted coconut oil for added fragrance and skincare benefits. Lavender, rose, or chamomile essential oils are excellent choices for relaxation and soothing the skin.
- Mix It Up: Stir the coconut oil and essential oils together until well combined.
- Customize to Your Needs: Feel free to customize your massage blend by adjusting the ratio of coconut oil to essential oils based on your preferences and skin type.
- Massage and Enjoy: To start, pour a good amount of the coconut oil massage blend into your hands. Then, softly massage it onto your skin using circular motions. Pay attention to any areas that feel tense or dry. Let the oil soak in completely. For a delightful treat, try incorporating gentle massage techniques to help you relax and boost circulation.
Conclusion
Say goodbye to dull, lackluster skin and hello to a radiant complexion with these top 12 remedies. Whether you prefer DIY masks made from kitchen staples or skincare products packed with natural ingredients, there’s something for everyone on this list. So, why wait? Brighten up your day and your skin with these simple yet effective remedies!
FAQs About Dull Skin
Q. How often should I use these remedies?
A. It depends on your skin type and the specific remedy. As a general rule of thumb, aim to use gentle exfoliating masks and toners 2-3 times a week, while hydrating masks and serums can be used daily or as needed.
Q. Can I use these remedies if I have sensitive skin?
A. Many of these remedies contain gentle, natural ingredients that are suitable for sensitive skin. However, it’s always a good idea to patch test a small area of skin before applying any new product to your face, especially if you have sensitive skin or are prone to allergies.
Q Are these remedies suitable for all skin types?
A. Most of these remedies are suitable for all skin types, but it’s essential to choose products and ingredients that are appropriate for your specific skin concerns. For example, if you have oily or acne-prone skin, you may want to avoid heavy, oil-based products and opt for lighter, non-comedogenic formulas instead.
Q. Can I use these remedies alongside my existing skincare routine?
A. Absolutely! These remedies can be incorporated into your existing skincare routine to help address specific concerns like dullness, dryness, or uneven skin tone. Just be sure to introduce new products gradually and pay attention to how your skin reacts.
Q. How long will it take to see results?
A. Results may vary depending on factors like the severity of your skin concerns, the frequency of use, and your individual skin type. In general, you can expect to see some improvement in your skin’s texture and appearance within a few weeks of regular use, but it may take longer to see significant changes. Patience and consistency are key!
You May Also Enjoy These Articles
Dusky Skin Tone
Green Veins Vs. Blue Veins
Oops! Retinol Ruined My Skin
Go-To Skincare